
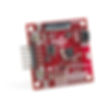
The SparkFun Edge Development board has a Cortex-M4F processor which I will be using for some TinyML experiments. The board comes with setup instructions which you can find here. As with everything else, how you need to set things up changes over time. This article will help you complete the setup on a computer running macOS Big Sur.
Install GNU Toolchain
Open a terminal and type the following commands
brew install cmake
brew tap ArmMbed/homebrew-formulae
brew install arm-none-eabi-gcc
Note that you might get an error when you run brew update. This error is related to shallow clones. You will get a git command to run to fetch what you need for the brew update to work. You can run brew update after the git command completes.
If that works, you should be able to run arm-none-eabi-gcc from the terminal.
Install the SDK
The original instructions include a link to download a zip file. The zip file was incomplete so I had to fetch the git repo directly.
git clone --recursive https://github.com/sparkfun/AmbiqSuiteSDK.gitYou can export the root of your Ambiq studio as AMB_ROOT to make it easy to work with.
Install Serial Drivers
The serial drivers are available here, along with instructions. You might not need the serial drivers, but it's fine if you do.
Check Your Serial Port
The quickest way of checking this is to run the following command before connecting your board and then once more after connecting the board.
ls /dev/cu*The output will be the communication ports that are available. Recall that we are communicating via our USB ports (unless you happen to have a computer with an actual serial port). To make things easy, you can run the command before connecting your hardware and then run the command again after connecting your hardware.
On my computer, the device appeared as both a cu* and a tty* with the difference being the prefix before the dot.
Try Compiling an Example
Run the following commands:
cd $AMB_ROOT/boards_sfe/edge/examples/lis2dh12_accelerometer_uart/gcc
make clean
Type the following command but DO NOT RUN IT YET!
make COM_PORT=/dev/tty.usbserial-14340 bootload_asb ASB_UPLOAD_BAUD=115200Please replace the value of COM_PORT with your correct serial terminal.
The upload baud rate is 115200. However, some boards use 921600 or 460800.
Flash The Example Onto The Board
First, get the board into a boot sequence using the following steps:
Plug the board in using the correct cable
Wait about 10 seconds for the board to boot up properly
Press and hold Button 14
Wait 2 seconds
Press and hold the RST Button for 1 second
Release the RST Button while still holding Button 14
Run the last command above (make ...) which you weren't supposed to execute until now.
You can release Button 14 after the command is done uploading the binaries to the board.
Press the RST Button momentarily to reboot the MCU.
A successful upload will have an output similar to the following.

Congratulations on making it thus far!
Update 1: Read Data From The Board
The example you flashed sends the sensor data back if you are connected to a computer over the serial port (USB cable). You can read this data using the following command.
screen /dev/tty.usbserial-14340 115200The command will cause the data to stream over to your screen.
Update 2: Errors While Executing the Make Command
Some users have experienced some errors while executing the make command.
ModuleNotFoundError: No module named 'Crypto'
You can fix this by running the following command.
pip install pycryptodome pyserialAt this point you should be ready to program the Sparkfun Edge development board.